Account statements provide a record of financial transactions within a specified period. These statements are essential for monitoring account activity and reconciling financial records accurately. In Actionstep, you can review aged receivables and generate account statements within the Billing workflow.
When you generate and send account statements:
- Every client will be sent an email with an attached PDF file of their account statement.
- The content of the email is generated based on the chosen email template.
Emailing Account Statements to Clients
You can either email account statements to a single client, a specific group of clients, or all clients.
Before you begin:
- Set up your account statement templates and your email templates. See Configuring Account Statement Document Templates (Admin) and Configuring Account Statement Email Templates (Admin) for help.
- Verify your contacts' email addresses. See Configuring Account Statement Email Addresses for help.
To send an account statement to your clients:
- In Actionstep Practice Management, go to Billing > Aged Receivables. The Aged Receivables page appears.
- Review the list of clients and account statements. To further refine the list, click Filter and choose your filters. See Getting to Know the Aged Receivables Filter for help.
- Optionally, use the As at calendar tool to set the date at which you want to run the accounts receivables.NOTE: For example, if you run your account statements monthly but the 31st of the month occurs on the weekend, you can use the As at date to run the aged receivables as at the last day of the month. This means that any payments or additional invoices that have occurred since that date are ignored and customers will receive account statements as at a particular date.
- Select the clients you want send statements to, based on the following:
- To send statements to specifically selected clients, select the checkbox for just those clients.
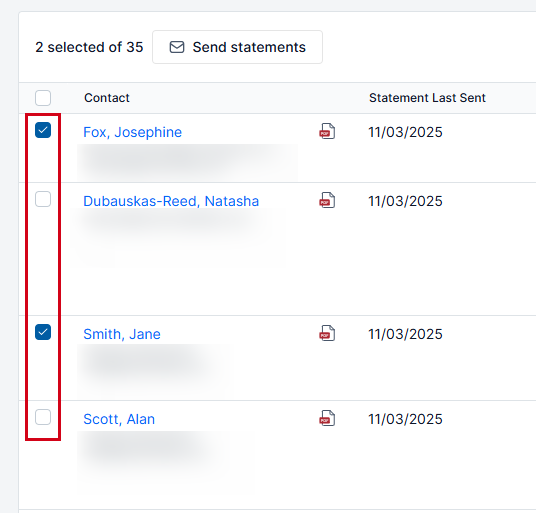
- To send statements to all of the clients whose records you are currently viewing (up to 50 per page), select the "select all" checkbox at the top of the Contact column. This selects all clients on this page.

- To send statements to all clients, leave all checkboxes cleared.
 TIP: When manually selecting specific contacts to send statements to, you are limited to what's available on the current page, which means you can only select up to 50 statements in a single batch. When sending statements to all of your contacts, there is a limit of 700 per batch.
- To send statements to specifically selected clients, select the checkbox for just those clients.
- Click Send statements or Send all statements, depending on your client selection. The Send account statements window appears.
- Choose the Email Template you want to use when sending the statement.
- Click Send. The statements are generated and emailed as attachments to the clients you selected.
Once you've sent your account statements, you can review your work. See the next section, Reviewing Sent Account Statements for more information.
Downloading and Sharing Statements with Clients
In some cases, you may have clients who are not able to receive emailed statements. In these cases, you can download a PDF of the statement and share it with them a different way, like printing and mailing it to them. When doing this, you can choose to mark the statement as "sent" so that your records more accurately show your billing workflow.
To do this:
- In Actionstep, go to Billing > Aged Receivables.
- Review the list of clients and account statements. To further refine the list, click Filter and choose your filters. See Getting to Know the Aged Receivables Filter for help.
- Identify the clients who require a delivery method different from email.
- Click the Download icon next to their name.
 The Download Statement window appears.
 - To track the download as an official "sent" action, select Mark statement as sent. Once the download is complete, today's date will be recorded on the transaction list.
- Click Download.
At this point, you can print the PDF and deliver or mail it to your client.
Reviewing Sent Account Statements
Once the statements are sent, you will receive an email confirming the number of statements that have been sent as well as if there were any errors. If you do experience errors, you can review which statements were not able to be sent by going to Billing > Aged Receivables and clicking Filter. Then set the Statement last sent filter to Is before [choose today's date]: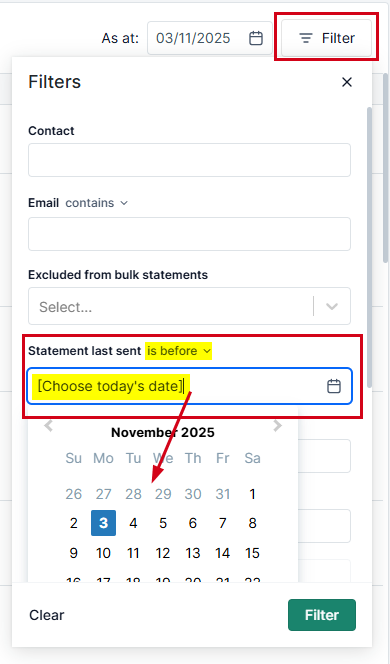
Additional Resources:
- About Account Statements
- Configuring Account Statement Email Addresses
- Configuring Account Statement Email Templates (Admin)
- Configuring Account Statement Document Templates (Admin)
- Working with Account Statement Template Merge Fields (Admin)
- Getting to Know the Aged Receivables Page
- Getting to Know the Aged Receivables Filter
- Aged Receivables Permissions (Admin)
- Account Statements FAQ
Was this article helpful?
That’s Great!
Thank you for your feedback
Sorry! We couldn't be helpful
Thank you for your feedback
Feedback sent
We appreciate your effort and will try to fix the article