Often, when a new matter is created, contacts must be assigned to the matter. To keep the process of creating a new matter efficient, Actionstep lets you assign an existing contact to a matter as you are creating the matter. As you type the name of your contact, this quick-add workflow displays a list of possible matches. Matching names include just a few key fields, like name, phone number, and email address.
If the contact you need to assign to the matter doesn't yet exist, you can use the Create Contact option on the drop-down list.
Assigning an Existing Contact to a Matter
You can quickly add a contact from your system to the matter you are viewing.
To do this:
- View a matter. (See Editing a Matter.)
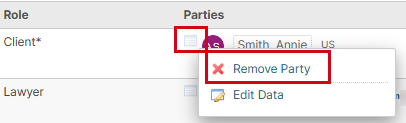
- Click the Parties icon to view the Parties page for the matter.

- For a specific role, click the Add [Party Type] drop-down list. For example, click Add Client, Add Lawyer, Add Doctor, etc.

- Search for the contact's name and select it. The contact is assigned to that role.
Creating a New Quick-Add Contact
At times, you may need to create a new contact while editing one of your matters.
To do this:
- View a matter. (See Editing a Matter.)
- Click the Parties icon to view the Parties page for the matter.

- For a specific role, click the Add [Party Type] drop-down list. For example, click Add Client, Add Lawyer, Add Doctor, etc.

- Click Create Contact, located at the bottom of the menu.
 The Create Contact window appears.
 - Select an Identity type. By default, Individual will be selected. If you're creating a contact for an organization, like a company, select Non-Individual. (This might be called Company in your system.)
- Enter the remaining contact details. (See Creating a Contact for additional instructions.)
- When you are finished, click Save. The contact is added to the matter.
Resolving Duplicate Contacts
The quick-add contact form can detect if the details you are entering are already used in a contact in the system. You can then review the duplicate and either proceed with creating the contact or cancel the process. Duplicates can be flagged based on the following criteria:
Matching or similar first and last name combination
Matching or similar company name
Matching phone number
Matching email address
To resolve duplicates:
- Enter a contact name (as described in the previous section). If the contact name is similar to an existing contact, a Confirm this is not a duplicate checkbox appears.

- Optionally, click Show the possible duplicate to review the contact already in your system.
- Choose whether to proceed:
- If the contacts are not the same, select Confirm this is not a duplicate and continue entering your information. Then click Save to save your work.
- If the contacts are the same, click Cancel to close the Create Contact window and not save the information.
Additional Resources:
Was this article helpful?
That’s Great!
Thank you for your feedback
Sorry! We couldn't be helpful
Thank you for your feedback
Feedback sent
We appreciate your effort and will try to fix the article