If multiple users at your firm are frequently using the Actionstep / Microsoft Office plug-in or Google Docs to simultaneously edit the same documents, you can use the File Checkout workflow to lock a document so only one user can access it at a time.
Using the Open in Microsoft 365 for the Web option is collaborative in nature, so there is no need to lock documents being edited by multiple people.
If using the Open in Microsoft 365 via Actionstep Plugin option to check documents out, an administrator with authority can force check the document back in.
If you require access to a document checked out by an unavailable user via OneDrive, please reach out to Actionstep Support for assistance.
Configuring Document Check-Out
To use the document check-out function, you must first enable it.
To enable file check-out:
- In Actionstep, view the matter where you want to enforce file check-out procedures. (See Editing a Matter.)
- Click the Documents menu icon. The Matter Documents page appears.
- In the panel on the left side of the document list, click Preferences.
 A list of options appears.
 - Toggle File Checkout to on.

- Click Preferences again to close the options pane and show the document folders again. The file checkout workflow is enabled.
Checking Documents In and Out
Once this feature is enabled, you and other users can open or download documents as you normally would. When you do, you will be prompted to enter an estimated check-in time. Optionally, you can optionally also leave a file note for other users to see.
To check out a document:
- In Actionstep, view the matter where you want to enforce file check-out procedures. (See Editing a Matter.)
- Click the Documents menu icon. The Matter Documents page appears.
- Select the document you want to edit.
- Click the Open drop-down menu and choose Open in Microsoft 365 via Actionstep Plug-in or Open in Google Docs.

- If prompted by your browser, confirm the action.
- When you see the Checkout window, enter the following information:
- In the Est. Check-in Time fields, enter the date and time when you expect to be finished with your changes and can check the file back in. You can use the +1 fields below the date and time fields to help you.
- Optionally, annotate your work in the File Note field.

- Click Continue.
- If prompted by your browser again to proceed, confirm the action.
- Make any changes you need to the document.
- When you're ready to check the document with your changes back in, do so. See the next set of steps, "To check in a document" for help.
Once you check a document out, only you or an admin with authority can check that document back in. This applies only to the Word plug-in. If using the OneDrive integration, only the user who has checked the document out is able to check this in. If a user without the proper permissions attempts to edit a document that has been checked out, they will see the following:
Once you are done making changes to a document, you can check the document back in. This will make the document available for other users to open and download.
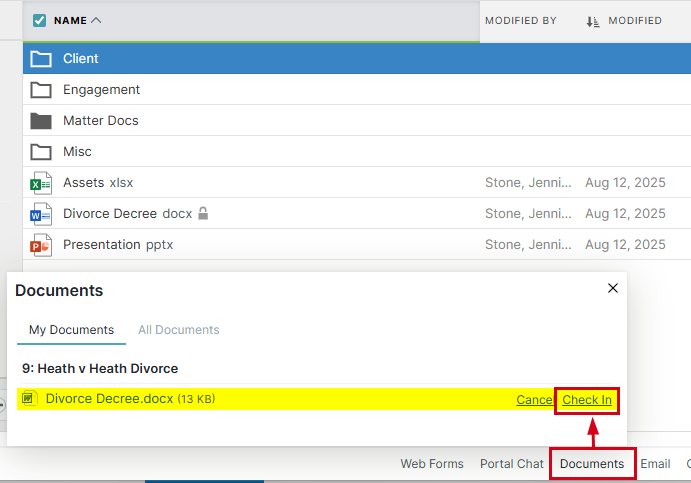
To check in a document:
- In Actionstep, view the matter with the document you want to check in. (See Editing a Matter.)
- Click the Documents menu icon. The Matter Documents page appears.
- Find the document you've been editing that you want to check in and click its lock icon.
 The Checking In File page appears.
 - Review the check-in information an enter a File Note, if you choose.

- Click Save to save your changes and complete the check-in procedure.
Was this article helpful?
That’s Great!
Thank you for your feedback
Sorry! We couldn't be helpful
Thank you for your feedback
Feedback sent
We appreciate your effort and will try to fix the article